468x60 Ads

Laptop Repair
Mobile Repair
Desktop Repair
Showing posts with label Desktop. Show all posts

Friday, June 15, 2012

Common Problems With a PC


PCs are the most common type of computer in the world. PCs can run a number of different operating systems, ranging from Microsoft Windows to Unix and Linux. Regardless of the operating system running on the computer, a number of common problems can occur with PC hardware. Understanding those problems can help with troubleshooting and repair.

Memory Problems
The most common problem experienced by PCs is inadequate random access memory (RAM). If your computer doesn't have enough RAM, it forces the hard disk to act as short-term storage for program execution. Because the hard disk is slower than RAM, it causes your overall computing experience to be slow and sluggish.

CPU Problems
Older CPUs may not be able to perform calculations fast enough for more modern operating systems and software. CPU power grows quickly, and after a number of years, newer software may simply outstrip an older CPU's ability to perform calculations to run the program. A good example of this is modern multiple-core CPUs. Multiple-core CPUs actually contain two or more CPUs in one package. CPUs that are a generation or two old only have a single core, or single CPU.

Hard Disk Failure
Hard disks are complex mechanical systems where components operate with very little margin for error. As a hard disk ages, components can wear out, causing mechanical failure. Some older computers cannot address the full range of newer high-capacity hard drives. As a result, some newer high-capacity hard drives may not work in older computers.

CD/DVD Drive Issues
CD and DVD drives use lasers to read data from the reflective portion of a CD or DVD. Over time, CD and DVD drive lasers can become misaligned. Because CD and DVD drives are mechanical, parts of the drive can fail over time. This is usually indicated by clicking or grinding noises when the computer tries to access the drive.

Power Supply Problems
The power supply in your PC is responsible for providing stable power to your computer's components. A power supply that is too small can cause problems with overheating, reboots and computer lockups. As a power supply ages, the voltages it provides to system components may begin to vary, causing similar symptoms to a power supply that is too small. A power supply that is failing or is too small can also cause problems, including failure, in other computer components.

Additional Reading:
https://docs.google.com/document/d/1HwMGH_6k_9oVo1-39kD-hfmidl_od4b0FdvKvz6_8z8/edit


Monday, June 11, 2012

How To Fix a Blue Screen of Death


A Blue Screen of Death, also called a STOP Error, will appear when an issue is so serious that Windows must stop completely.

A Blue Screen of Death is usually hardware or driver related. Most BSODs show a STOP code that can be used to help figure out the root cause of the Blue Screen of Death.


Did your PC restart after the BSOD? If the blue screen flashed and your computer rebooted automatically before you had time to read anything, see Tip #3 at the bottom of the page.


Important: Below are general Blue Screen of Death troubleshooting steps.


Note: Some of these steps may require you to start Windows in Safe Mode. If that's not possible then skip those steps.

Difficulty: Average

Time Required: It might take you several hours to fix a Blue Screen of Death, depending on the STOP Code.

Here's How:

1. The most important Blue Screen of Death troubleshooting step you can take is to ask yourself what you just did.

Did you just install a new program or a piece of hardware, update a driver, install an update, etc.? If so, there's a very good chance that the change you made caused the BSOD. Undo the change you made and test again for the STOP Error. Depending on what change you made, some solutions might include:
- Startup using Last Known Good Configuration to undo recent registry and driver changes
- Use System Restore to undo recent system changes.
- Roll Back device driver to version prior to your driver update.

2. Verify that a minimum amount of free space is available on your Windows partition. Blue Screens of Death and other serious issues, like data corruption, can occur if there's not enough free space on your primary partition used for the Windows operating system.

Note: Microsoft recommends that you maintain at least 100MB of free space but I regularly see problems with free space that low. I usually advise Windows users to keep at least 15% of a drive's capacity free at all times.

3. Scan your computer for viruses. Some viruses can cause a Blue Screen of Death, especially ones that infect the master boot record (MBR) or boot sector.

Important: Make sure your virus scanning software is completely up to date and that it's configured to scan the MBR and boot sector.

4. Apply all available Windows service packs and other updates. Microsoft regularly releases patches and service packs for their operating systems that may contain fixes for the cause of your BSOD.

5. Update drivers for your hardware. Most Blue Screens of Death are hardware or driver related so updated drivers could fix the cause of the STOP error.

6. Check the System and Application logs in Event Viewer (7/Vista | XP) for errors or warnings that might provide more clues on the cause of the BSOD.

7. Return hardware settings to default in Device Manager. Unless you have a specific reason to do so, the system resources that an individual piece of hardware is configured to use in Device Manager should be set to default. Non-default hardware settings have been known to cause a Blue Screen of Death.

8. Return BIOS settings to their default levels. An overclocked or misconfigured BIOS can cause all sorts of random issues, including BSODs.

Note: If you've made several customizations to your BIOS settings and don't wish to load the default ones then at least try returning clock speed, voltage settings, and BIOS memory options to their default settings and see if that fixes the STOP error.

9. Make sure all internal cables, cards, and other components are installed and seated properly. Hardware that's not firmly in place can cause a Blue Screen of Death so try reseating the following and then test for the STOP message again:

- Reseat all internal data and power cables
- Reseat the memory modules
- Reseat any expansion cards

10. Perform diagnostic tests on all hardware you're able to test. It's highly likely that the root cause of any given Blue Screen of Death is a failing piece of hardware:

- Test your system memory
- Test your hard disk drive

If a test fails, replace the memory or replace the hard drive as soon as possible.

11. Update your BIOS. In some situations, and outdated BIOS could cause a Blue Screen of Death due to certain incompatibilities.

12. Start your PC with essential hardware only. A useful troubleshooting step in many situations, including BSOD issues, is to start your computer with the minimum hardware necessary to run the operating system. If your computer starts successfully it proves that one of the removed hardware devices was the cause of the STOP message.

Tip: Typically, the only necessary hardware for starting your PC through to the operating system includes the motherboard, CPU, RAM, primary hard drive, keyboard, video card, and monitor.

Tips:Find that hardware is the cause of your Blue Screen of Death?

Try this:
- Replace the hardware.
- Update the hardware's firmware.
- Make sure the hardware is on the Hardware Compatibility List.
- Check with the manufacturer for support information.

Find that a software program is the cause of your Blue Screen of Death?
Try this:
- Reinstall the software.
- Check for and install any available program updates.
- Check with the developer for support information.
- Try a competing program.

Is your PC restarting before you can read the STOP Code on the Blue Screen of Death?

Most Windows PCs are configured to reboot immediately after receiving a serious error like a BSOD. You can prevent this reboot by disabling the automatic restart on system failure option.

How To Troubleshoot Stopping, Freezing, or Reboot Issues During Windows Startup


One particularly frustrating way in which your computer might not start is when you encounter an issue during the Windows startup process but have nothing to go on - no Blue Screen of Death or other error message.

Your computer might freeze on the Windows splash screen, in which case you'll have to restart it manually, only to freeze at the same place again. Or maybe your computer restarts automatically sometime after Windows begins to load, causing what's called a "reboot loop."

Sometimes your computer might even stop at a point where you can move your mouse around but nothing happens. Windows might seem like it's still trying to start but eventually you have to manually reboot your computer, only to see the same behavior again!

Note: If you see a blue screen full of information flash on the screen before your computer reboots, this is a Blue Screen of Death and your computer happens to be configured to reboot after one. See How To Troubleshoot Windows STOP Errors instead of this guide.
Important: If your PC is in fact booting to the Windows login screen, you see any kind of error message, or if you're not even getting past the POST.

Difficulty: Average

Time Required: Anywhere from minutes to hours depending on why Windows isn't starting correctly

Here's How: 

1. Restart your computer if you haven't already done so at least once since seeing this problem.
Many things go on in the background when Windows is starting up. Sometimes things don't work exactly as they should, especially after Windows has installed updates or there were other major changes to the operating system the last time it was up and running. A restart might be all Windows needs to get back on track.
  
2. Repair your Windows installation. A common reason for Windows to freeze up or reboot automatically during the Windows startup process is because one or more important Windows files are damaged or missing. Repairing Windows replaces these important files without removing or changing anything else on your computer.

Note: In Windows 7 and Vista, this is called a Startup Repair. In Windows XP it's referred to as a Repair Installation.

Important: The Windows XP Repair Installation is more complicated and has more drawbacks than the Startup Repair available in the other operating systems. So, if you're an XP user, you may want to wait until you've tried Steps 3 through 6 before giving this a try.

3. Start Windows using Last Known Good Configuration. If you've just made a change to your computer that you suspect might have caused Windows to stop booting properly, starting with the Last Known Good Configuration could help.
Last Known Good Configuration will return many important settings to the states they were in the last time Windows started successfully, hopefully solving this problem and allowing you back in to Windows.

4. Start Windows in Safe Mode and then use System Restore to undo recent changes. Windows could freeze, stop, or reboot during the startup process because of damage to a driver, important file, or part of the registry. A System Restore will return all of those things to their last working order which could solve your problem entirely.

Note: Depending on the reason that Windows isn't starting, you might not even be able to enter Safe Mode. Luckily, you can also perform a System Restore from System Recovery Options which is available from the Advanced Boot Options menu in Windows 7 and also from your Windows 7 or Windows Vista Setup DVD.

Important: Please know that you will not be able to undo a System Restore if it's done from Safe Mode or from System Recovery Options. You might not care since you can't start Windows normally anyway, but it's something I wanted you to be aware of.

5. Scan your computer for viruses, again from Safe Mode.

A virus or other kind of malware might have caused a serious enough problem with a part of Windows to cause it to stop starting properly.

6. Clear the CMOS. Clearing the BIOS memory on your motherboard will return the BIOS settings to their factory default levels. A BIOS misconfiguration could be the reason that Windows is freezing during startup.

Important: If clearing the CMOS does fix your Windows startup problem, make sure future changes in BIOS are completed one at a time so if the problem returns, you'll know which change caused the problem.

7. Replace the CMOS battery if your computer is more than three years old or if it's been off for an extended amount of time.

CMOS batteries are very inexpensive and one that is no longer keeping a charge can certainly be the cause of Windows freezing, stopping, or rebooting during startup.

8. Reseat everything you can get your hands on. Reseating will reestablish the various connections inside your computer and is very often a "magic" fix to startup problems like this, especially reboot loops and freezes.

Try reseating the following hardware and then see if Windows will boot properly:
  • Reseat all internal data and power cables
  • Reseat the memory modules
  • Reseat any expansion cards
Note: Unplug and reattach your keyboard, mouse, and other external devices as well.

9. Check for causes of electrical shorts inside your computer. An electrical short is often the cause of reboot loops and hard freezes while Windows is starting.

10. Test the RAM. If one of your computer's RAM modules fails completely, your computer won't even turn on. Most of the time, however, memory fails slowly and will work up to a point.
If your system memory is failing, your computer may power on but then freeze, stop, or reboot continuously at some point during Windows startup.

Replace the memory in your computer if the memory test shows any kind of problem.

11. Test the power supply. Just because your computer initially turns on does not mean that the power supply is working. While it might not be common for your computer to get all the way to the Windows startup process with a damaged power supply, it does happen and is worth a look.
Replace your power supply if your tests show a problem with it.

12. Replace the hard drive's data cable. If the cable that connects the hard drive to the motherboard is damaged or not working then you could see all kinds of issues while Windows is loading - including freezing, stopping, and reboot loops.

Don't have a spare hard drive data cable? You can pick one up at any electronics store or you could borrow the one that another drive, like your optical drive, is using, assuming of course that's it's the same type of cable. Newer drives use SATA cables and older drives use PATA cables.

Note: A loose hard drive data cable can cause the same issues that a damaged one can but hopefully you checked for connection issues with the cable back in Step 8.

Important: Make sure you've tried your best to complete the troubleshooting steps up to this one. Steps 13 and 14 both involve more difficult and destructive solutions to freezing, stopping, and continuous reboot problems during Windows startup. It may be that one of the below solutions is necessary to fix your problem but if you haven't been diligent in your troubleshooting up to this point, you can't know for sure that one of the easier solutions above isn't the right one.

13. Test the hard drive. A physical problem with your hard drive is certainly a reason why Windows might reboot continuously, freeze completely, or stop in its tracks. A hard drive that can't read and write information properly certainly can't load an operating system properly.
Replace your hard drive if your tests show an issue. After replacing the hard drive, you'll need to perform a new installation of Windows.

If your hard drive passes your test, the hard drive is physically fine so the cause of the problem must be with Windows, in which case the next step will solve the problem.
  
14. Perform a Clean Install of Windows. This type of installation will completely erase the drive and install Windows again from scratch.

Important: In Step 2, I advised that you try to solve Windows-caused startup issues by repairing Windows. Since that method of fixing important Windows files is non-destructive, make certain that you've tried that before the completely destructive, last-resort clean install in this step.


Computer turns off without warning

Question

Computer turns off without warning.

Cause

This issue could be caused by any of the below possibilities.
  1. Heat related issue.
  2. Hardware issue or error.
  3. Computer virus.
  4. Issue with operating system.
  5. Other failing hardware

Answer

Tip: This document is for computers that remain off and not computer's that turn back on (restart).
Caution: Some of the below steps require you open your computer. While in the computer, be cautious of ESD.

Heat related issue
A computer that turns off without warning is often a heat related issue. Many computers today are designed to turn off or automatically reboot if the computer, processor, or other device in your computer gets too hot. If you have heard any abnormal noises coming from your computer recently such as a high squealing, this could indicate a fan may be failing in your computer.

You can first start by verifying the fan on the power supply is working by examining the back of the computer and seeing if the fan is moving and moving smoothly. For all other fans in the computer, you will need to either open the computer and make sure the fan are working (processor fan and case fans) and if your BIOS monitors the RPM of the fans, enter BIOS and make sure the BIOS does not report any errors.
While inside the computer it's also a good idea to verify the processor heatsink is properly connected by disconnecting and reconnecting the heatsink. If the processor heatsink is not properly attached to the processor the computer to overheat.

Hardware issue or error
Any failing hardware component in your computer could cause your computer to unexpectedly turn off without warning. If you have recently attempted to add a new hardware device, remove that device to make sure it is not causing your issues.

Before attempting to remove any hardware, make sure you are not encountering this issue because of hardware conflicts by checking Device Manager for errors.

If you have not recently installed any new hardware into the computer, the next best solution to determining if this is a hardware issue would be remove any hardware on the computer that is not needed. For example, remove your modem, network card, sound card, and any other expansion cards that are not needed for the computer to operate. Run the computer without these cards to see if they are the cause of your issue.

Computer virus
It's possible for your computer to be infected with a virus that is designed to shut down your computer or turn it off. If your computer seems to be turning off when executing a certain program at specific times in the day, it could be infected.

If you believe your computer may be infected with a virus or are uncertain if your computer is infected with a virus, make sure your virus scanner definitions are up-to-date.

Issue with operating system
If after following each of the above recommendations your computer still continues to reboot, it is likely that you are experiencing a Microsoft Windows operating system related issue that cannot be explained. To help make sure this is the case, try the below steps.
  1. Reboot the computer and enter CMOS setup as the computer is booting.
  2. After you have loaded the computer in CMOS setup, let the computer sit.
If the computer does not turn off while letting the computer sit in CMOS, it is likely that you are in fact experiencing an issue with Microsoft Windows or your operating system and it is recommend that if you have followed all of the above recommendations that you erase everything and reinstall Microsoft Windows.

Other failing hardware
If after reinstalling your operating system, or during the installation of your operating system, your computer turns off abnormally, it is very likely that other hardware is failing in the computer. Often this is RAM, CPU, Motherboard, and Power Supply (in that order).

If you have extra available parts or have a friend or co-worker with a similar configuration that is willing to allow you to test their hardware in your computer, try swapping these parts to determine if they are at fault. Otherwise, you will need to have the computer serviced.

How to repair and revive Hard Disk Drives (HDD)

Loosing precious data due to hard disk failure is something that everyone never wanted to happen. That is why, we need, you need to constantly have a fresh backup of those precious data. But, in some cases where you were unable to perform backup and the drive gone bad, fear not, for you can still repair and revive your drive and perform data recovery before your drive would be totally unusable.
One software that i have been using for quite sometime now and never failed me so far is the HDD (Hard Disk Drives) Regenerator. This great software can do the following.
  • Detect physical bad sectors on a hard disk drive surface
  • Repair physical bad sectors (magnetic errors) on a hard disk drive’s surface
  • It works with any file systems including NTFS and FAT, also with unformatted and unpartitioned hard disk drives
  • Supports bootable regenerating floppy and cd to automatically start the regenerating process


I always use this software as the last resort for reviving my hard disk drives. regeneration takes a whole night for a 40gb drive, depends on the drive capacity that you are regenerating.
You can download the demo version of the software here.

How To Perform a Startup Repair in Windows 7


The Startup Repair tool repairs Windows 7 by replacing important operating system files that might be damaged or missing. Startup Repair is an easy diagnostic and repair tool to use when Windows 7 fails to start properly. To begin the Windows 7 Startup Repair process, you will need to boot from the Windows 7 DVD. Watch for a Press any key to boot from CD or DVD... message similar to the one shown in the screenshot above.

Press a key to force the computer to boot from the Windows 7 DVD. If you do not press a key, your PC will try to boot to the operating system that's currently installed on your hard drive. If this happens, just restart your computer and try to boot to the Windows 7 DVD again. Note: Not using Windows 7? Every modern Windows operating system has a similar operating system file repair process.

No user intervention is required here. Just wait for the Windows 7 setup process to load files in preparation for whatever task you might want to complete. In our case it's a Startup Repair but there are a lot of tasks that could be completed with the Windows 7 DVD.

Note: No changes are being made to your computer during this step. Windows 7 is only temporarily "loading files."


Choose the Language to install, Time and currency format, and Keyboard or input method that you'd like to use in Windows 7.

Click Next.

Click on the Repair your computer link on the bottom-left of the Install Windows window.

This link will begin the Windows 7 System Recovery Options which contains several useful diagnostic and repair tools, one of which is Startup Repair.

Note: Do not click on Install now. If you already have Windows 7 installed, this option is used to perform a Clean Install of Windows 7 or a Parallel Install of Windows 7.


System Recovery Options, the set of tools that contains Startup Repair, will now search your hard drive(s) for any Windows 7 installations.

You don't need to do anything here but wait. This Windows installation search shouldn't take more than a few minutes at most.


Choose the Windows 7 installation that you'd like to perform the Startup Repair on.

Click the Next button.

Note: Don't worry if the drive letter in the Location column does not match the drive letter that you know Windows 7 is installed on in your PC. Drive letters are somewhat dynamic, especially when using diagnostic tools like System Recovery Options.

For example, as you can see above, my Windows 7 installation is listed as being on drive D: when I know that it's actually the C: drive when Windows 7 is running.


Click on the Startup Repair link from list of recovery tools in System Recovery Options.

As you can see, several other diagnostic and recovery tools are available in the Windows 7 System Recovery Options including System Restore, System Image Recovery, Windows Memory Diagnostic, and Command Prompt.

In this guide, however, we're only repairing operating system files using the Startup Repair tool.


The Startup Repair tool will now search for problems with important Windows 7 files.

If Startup Repair finds a problem with an important operating system file, the tool may suggest a solution of some kind that you have to confirm or may solve the problem automatically. Whatever happens, follow the prompts as necessary and accept any changes suggested by Startup Repair.

Important Note:
If you want the Startup Repair to work properly, you must remove any flash drives or other USB storage devices, like external hard drives, from your computer before running the tool. Due to the way some computers report the storage space on USB connected drives, the Windows 7 Startup Repair may incorrectly report that it found no problems when in fact there may actually be an issue.

If you've already started, or completed, the Startup Repair and you realize that you have a USB storage device connected, just remove it and restart these instructions at Step 1.


Startup Repair will now attempt to repair whatever problems it found with Windows 7 files. No user intervention is required during this step.

Important:
Your computer may or may not restart several times during this repair process. Do not boot from the Windows 7 DVD on any restart. If you do, you'll need to restart immediately so the Startup Repair process can continue normally.

Note: If Startup Repair did not find any problem with Windows 7, you won't see this step.

Click the Finish button once you see the Restart your computer to complete the repairs window to restart your PC and start Windows 7 normally.
Important: It's possible that Startup Repair didn't fix whatever problem you were having. If the Startup Repair tool determines this itself, it may automatically run again after your computer restarts. If it does not automatically run but you're still seeing problems with Windows 7, repeat these steps to run Startup Repair again manually.
Also, be sure to read the Important Note on Step 8.
If it becomes apparent that Startup Repair is not going to solve your Windows 7 problem, you do have some additional recovery options including a System Restore or a System Image Recovery, assuming you have previously backed up your entire computer.
You could also try a Parallel Install of Windows 7 or a Clean Install of Windows 7.
However, if you've tried a Startup Repair of Windows 7 as part of another troubleshooting guide, you're probably best served by continuing with whatever specific advice that guide is giving as your next step.

POST troubleshooting steps


Question

POST troubleshooting steps.

Additional information

This document is intended to help users who are experiencing issues with the POST and may have any of the below symptoms.
  1. Computer beeps irregularly when the computer is turned on.
  2. Computer turns on but does not boot or do anything.
  3. Computer reboots every few seconds.

Answer

Tip: Make sure the computer turns on, if nothing happens (no lights, no sound, no fans, etc.) the computer has a power related issue.
Caution: Some of the below steps recommend removing physical parts within the computer. While in the computer it is highly recommend that you be aware of ElectroStatic Discharge (ESD) and its potential hazards.
Remove new hardware
If any new hardware has been recently added to the computer, remove that hardware to make sure it is not the cause of your issue. If after removing the new hardware your computer works it's likely the computer is either not compatible with the new hardware or a system setting needs to be changed to work with the new hardware device.
Remove any disks or USB devices
Remove any disks, CD's, DVD's that are in the computer and if any USB devices (iPods, drives, phones, etc) are connected disconnect all of them as well. Reboot the computer and see if anything changes.
Disconnect external devices
Remove everything from the back of the computer except the power cable. Turn on the computer and see if it beeps normally. If the computer has never beeped keep the monitor or display connected to see if any change occurs.
Identify beep code
If you are receiving a sequence of beeps see the beep code page for a listing of different beep codes and their explanation or your motherboard or computer documentation. These beep codes are meant to help identify what computer component is failing or bad. If your beep code is not listed, continue troubleshooting.
Check all fans
Make sure all fans are running in the computer. If a fan has failed (especially the heat sink fan for the CPU) your computer could be overheating or detecting the fan failure causing the computer not to boot.
Check all cables
Verify that all the cables are properly connected at that there are no loose cables by firmly pressing in each cable.
  • All disk drives should have a data cable and power cable connected to them.
  • Your power supply should have at least one cable going to the motherboard. Many motherboards may also have additional cables connected to them to supply power to the fans.
Disconnect all expansion cards
If the above recommendations still have not resolved the irregular POST, disconnect the riser board (if applicable) and each of the expansion cards. If this resolves the issue or allows the computer to POST connect one card at a time until you determine what card is causing the issue.
Disconnect all drives
If you were unable to determine by the beep code what is failing or do not have a beep code disconnect the IDE, SATA, SCSI, or other data cables from the CD-ROM, hard drive, and floppy drive from the Motherboard.
If this resolves your irregular POST or generates error messages re-connect each device until you determine what device or cable is causing the issue. In some situations it can also be a loose cable connection that causes the issue.
Remove the RAM
If you continue to to receive the same problem with all the above hardware removed, disconnect the RAM from the Motherboard and turn on the computer. If the computer has a different beep code or if your computer was not beeping and is now beeping turn off your computer and try the below suggestions. Making sure to turn off the computer each time you're adding and removing the memory and then turning the computer back on to see if the suggestion resolves the issue.
  1. Re-insert the memory into the same slot.
  2. If you have more than one stick of memory remove all but one stick of memory, try rotating through each stick.
  3. Try one stick of memory in each slot.
If you're able to get the computer to boot with one or more of the sticks of memory it's likely you're dealing with some bad memory. Try to identify what stick of memory is bad and replace it.
If you're able to get memory to work in one slot but not another slot. You're motherboard is defective you can either workaround the issue by running the memory in a different slot or replace the motherboard.
Power cycle the computer
In some situations a computer may have power related issues often caused by either the power supply or the motherboard. To help determine if this is the cause of your issue try turning the computer on, off, and back on as fast as possible, making sure the computer power light goes on and off each time. In some situations you may be able to temporarily get the computer to boot.
This should only be used as a temporary workaround if you're able to get this to work. Often this is good for users who may have not done a backup and need to get the computer up one more time to copy files before starting to replace hardware.
Disconnect and reconnect the CPU
For users who are more comfortable working with the inside of their computer or who have built their computer one last recommendation before assuming hardware is bad is to reseat the CPU by removing it and putting it back into the computer.
Bad motherboard, CPU, RAM, or power supply
If after doing all of the above recommendations you continue to have the same issue unfortunately it is likely that you have bad Motherboard, PSU, CPU, or RAM. The next step would be either to replace these components or have the computer serviced. If you plan on doing the repairs yourself or you are a repair shop it is suggested that you replace the Motherboard first, RAM, CPU, and then power supply in that order or try swappable parts from other computers.

Sunday, June 10, 2012

Bad Power Supply (PSU) – How to Check If a Power Supply is Dead

My Computer Won’t Turn On… Is My Power Supply Faulty?
Troubleshooting a Bad Power Supply is pretty straight forward. Since the Power Supply is self contained issues with the PSU are not usually the result of a configuration issue.
There are several you can check though before deciding the power supply is faulty. The first and foremost method is to use a power supply tester to check for a faulty PSU. Unfortunately not people own one until they need one, so there are some manual troubleshooting steps you can perform to check for a bad power supply.

How To Troubleshoot a Bad or Faulty Power Supply (PSU)

    • WARNING: Power Supplies contain internal components that can store an electrical charge. Never attempt to repair the internal components of a Power Supply as you risk personal injury and also void the warranty on the PSU.
01. Check that the AC Power Cable is Connected Firmly to the Wall Outlet and PSU.
The PSU can commonly be stiff when connecting the AC power cable so make sure the cable and power supply are making good contact with one another.
02. Check the AC Outlet that the Power Supply is Plugged Into.
If it is a wall outlet, ask yourself if it is controlled by a wall switch. If so is the switch turned on?
If you are using a power strip or surge protector check to make sure the power switch is set to “On”. There will usually be a little red light that indicates this on a decent power strip or surge protector.

03. Check the On/Off switch on the Power Supply itself.
Most new power supplies all have an On/Off switch. This is a little black switch on the back of the power supply that has a one and a zero on it. (It may look like an I / O on the switch).
Make sure this switch is set to “On”. If the switch is set to one (1) this indicates that the power supply is turned “On”. If it is set to zero (0) it means the PSU is currently switched off. Make sure the switch is set to the one (1) position.
04. Check the Voltage Switch on the Power Supply.
On most new Power Supplies there is a red switch on the back that indicates voltage. This can be set to either 115V or 230V.
In the USA all our households use 115V from the wall AC outlets for standard appliances. If you are in the US make sure your Power Supply is set to 115V. If you are from Europe I believe your PSU needs to be set to 230V.

05. Check the 20/24 Pin ATX Power Connector and 4 Pin ATX Power Connector
Most motherboards require that you connect two Power Leads from a Power Supply to power your motherboard.
The main power lead is the 20/24 Pin ATX power connection which plugs in near the memory slots on your motherboard. The secondary power lead that is required is the 4 pin ATX power connection.
Make sure both of these leads are plugged in securely to your motherboard. You should feel a small click when they are properly inserted.
It is not uncommon for a lead to feel stiff and not go in all the way. To ensure that the ATX power leads are firmly connected disconnect each on and reconnect them to the motherboard.
06. Use Observations on the Power Supply to Determine if it’s Faulty.
  1. If your motherboard has a power LED on it, is this light turned on. (The motherboard power LED will normally glow even when the system is powered down.) If it is glowing this confirms the board is receiving power from the PSU and the problem may lie elsewhere.
  2. Can you see or hear the fan inside the power supply spin when you try to power on the system. If you do not see or hear it spinning this can be a sign of a bad power supply.
  3. Did the power supply make any crackling or popping noises when you tried to start the system? If so, this is a sign that a component inside the power supply has failed.
  4. Did you see a spark or smoke come out of the power supply? If so this is another sign that a component inside the Power Supply has failed.
  5. Does the power supply smell like burning electrical components. If so this is another sign of component failure inside the power supply.
07. Use Another Power Supply for Testing
If you have performed all of the above steps and have still not been able to determine if your issues are a result of a bad power supply use an extra power supply (if applicable) or a PSU from another system and try to start your system with the secondary Power Supply.
If it powers on with the other power supply you have determined your original Power Supply is bad or faulty.

Troubleshooting a Bad Power Supply Summary

If you have determined your Power Supply is bad you have two main options.
  1. If your power supply is under warranty send it into the retailer or manufacturer for RMA replacement.
  2. If your power supply is outside of the warranty period you will need to purchase a new power supply.
If you have any questions or comments regarding this article please feel free to leave them below.

How-to POST Test a Motherboard – POWER ON SELF TEST Guide


Motherboard POST Information – Troubleshooting and Diagnostic

To perform a POST TEST (Power On Self Test) on a motherboard you need four pieces of hardware.
  • The Motherboard
  • A CPU (Processor)
  • Memory (RAM)
  • A Power Supply
Depending on whether your motherboard has onboard video or not you may also need a Video Card for the POST Test.

01. A Good Motherboard Testing Area


Place your Motherboard on a non-conductive surface. A foam pad works great. Otherwise use the antistatic bag, or box the motherboard came in for a testing surface. (Make sure no metal is touching the motherboard or it may short out.)

02. Install the System Memory (RAM)


Install your memory onto your motherboard. Check the notch in the bottom of your memory to make sure it is oriented the correct way when you install it into your motherboard.
When you insert the RAM into the memory slots on the motherboard you should feel two tabs on each end of the memory socket snap into place. Check to make sure your RAM is seated level in the memory socket.

If it is not seated properly you will need to remove the memory and reinstall it. In the picture above you can see the tab has not locked the memory in place and the memory is not seated correctly. The tab should remain flush with the others once the memory has been installed properly.

03. Mounting Your CPU (Processor)


Next you will need to install your processor. All CPU sockets have a lever that needs to be opened to install the CPU. Make sure this lever is open so you can get the processor into the CPU Socket.
Picture #1 shows an Intel CPU Socket with the lever closed.
Picture #2 shows an AMD CPU Socket with the lever closed.


Before placing your processor in the CPU Socket check for an alignment indicator on the CPU.
Picture #1 – On Intel Processors there are two (2) notches on the bottom of the CPU that will line up with 2 notches on the CPU Socket.
Picture #2 – On AMD Processors this will be a small arrow marked on one corner of the CPU that aligns with a mark on the CPU Socket.
Make sure to note these indicators and double check that your CPU is aligned the correct way when you place it into the CPU Socket. This will help you avoid bent pins that may damage the CPU.

Once the Processor is installed securely in the CPU Socket you will need to close the socket and secure the lever on the CPU Socket. This will lock the CPU in place.
Once you have closed the lever on the CPU Socket you will need to install your CPU Heat Sync.
Picture #1 – Shows an Intel Processor mounted in the CPU Socket. The lever is closed locking the CPU in place.
Picture #2 – Shows an AMD Processor mounted in the CPU Socket. The lever is closed locking the CPU in place.

04. Installing the CPU Heat Sync (Cooler)


All retail box CPUs come with a CPU Heat Sync. You should have received one in the box when you purchased your CPU.
(Make sure to remove the plastic cooler on the bottom of the heat sync if it has one. DO NOT remove the grey square or circle on the bottom of the heat sync. This is known as the “heat patch” and is needed for the cooler to function properly.

05. Hookup the Power Supply to the Motherboard

Most Power Supply (PSU) units require two connections to the motherboard to provide power for a POST Test.

The first connection is the 20/24 pin ATX power connection. This will go into the 20/24 pin white connection on your motherboard. This is usually located near your memory sockets.
This connection is “keyed” meaning it will only fit one way. Align the notch on the 20/24 power cable with the tab on the 20/24 pin power socket. When you insert the connection you should feel a small click as the tab latches in place.

Now you need to plug in the 4 pin ATX power connection. This is usually located between your CPU and your IO ports.
This connection is also “keyed” so it will only fit into the socket one way. Once again align the notch on the cable with the tab on the socket and you should have trouble getting it to snap into place.

06. Installing a Video Card (Or not)

If you have an all in one motherboard you are ready to perform the motherboard POST test. Simply hookup your VGA (Monitor) connection and your PS2 Keyboard and Mouse connections.

If you do not have a spot to connect your monitor (VGA) cable then you probably need to install a video card.
Installation of the video card is very straight forward. You simply need to insert your video card into your PCI express socket (or AGP depending on how old the motherboard us.) You should feel the card snap into place.
Some cards do not feel like they lock in when they are inserted into the motherboard. If this is the case check the socket where the video card plugs into the motherboard and make sure it looks level.

Some video card slots have a tab, or notch on the side closet to your memory that is designed to lock the card into place. Check this tab and make sure it is latching properly if you are having trouble getting your video card installed.

07. Hooking Up Your Keyboard, Mouse and Monitor


Once you have everything in place you need to attach the cables for your mouse, keyboard and monitor. If you are using a video card make sure you attach your monitor cable to the correct VGA port.


Make sure to also connect the AC Cable to your power supply. Once the AC cable is connected check for a black switch on your power supply unit (PSU). This switch has a setting of one (1) or zero (0). One is “On” and Zero is “Off” so make sure this black switch is set to One “On”.

08. POST Testing Your Motherboard

To POST Test the motherboard we now need to turn the hardware on. To do this we will use a flat head screw driver to connect the power switch pins on the motherboard.
Refer to your motherboard manual for help in identifying these pins. These are commonly labeled red, black, or green but can vary depending on the motherboard. It is always best to refer to the manual to locate these pins.

Once you have located the two (2) pins for the power switch take your flathead screw driver and connect the two pins to power on the board.

When you tap them with the screw driver you should see your CPU fan start to spin. In a couple seconds you should hear a beep from your motherboard. One beep means the board has successfully POSTed.
(NOTE: Some motherboards do not have a speaker and may not beep.)
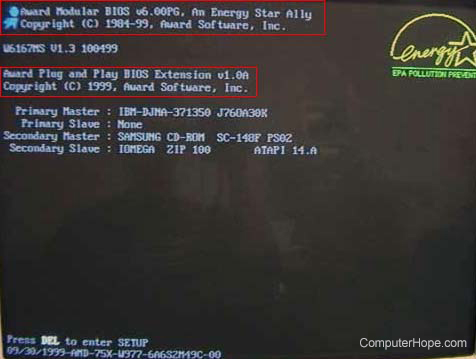
The main thing to look for is POST information on your monitor. Once you have POST Tested the motherboard you should see information displayed on your screen. If you see this information it is a sign that the computer has successfully completed the POST.

09. Completed POST Test


If you saw the information displayed on your screen you have successfully completed POST testing your board. You now know that all your basic hardware is functioning correctly and can proceed building your computer.
Share

Widgets